If you have a 5I20 or 4I65 follow these directions instead. Most newer MESA boards can use the directons below.
This is a guide showing how to generate a bitfile for your MESA boards running HOSTMOT2 in LINUXCNC or at least what I encountered along the way. My Linuxcnc was installed on Ubuntu 10.04 from the live CD install and this tutorial uses Xilinx Design Suite 14.5 on Linux. If you haven’t already installed the Xilinx Design Suite you can download it here.
Launching Xilinx Design Suite 14.5
Open terminal and type sudo su to run as root. Navigate to the directory /opt/Xilinx/14.5/ISE_DS or where you installed Xilinx Design Suite.
Type in: source settings32.sh which came with the Design Suite to set up the environment. Launch the program from the terminal by typing: ise The Application should launch.
Things to know
In this example I will be using the hostmot2 EPPHM2 firmware. You will need to choose:
-
The right project file (.xise) for your board
-
The right FPGA chip selected in the Top(XXX)HostMot2 file. ( where (XXX) could be: epp,epps,spi,usb,ether,serial,pci etc).
-
The right ucf file assosciated with the top vhdl file. (The card specific project files do that for you)
Otherwise you will get bit hash/mish mash in PCW’s words.
Here are a list of Top vhd files and their associated boards:
        Top9054HostMot2.vhd 5I21,5I22,5I23,3X20, 4i68, 4I69+
        TopEPPHostMot2.vhd 7I43, 7I61 EPP
        TopEPPSHostMot2.vhd 7I90 EPP
        TopPCIHostMot2.vhd 5I24, 5I25, 6i25, 4I74
        TopUSBHostMot2.vhd 7I32, 7I61 USB
        TopEthernet16HostMot2.vhd 7I80, 7I76E, 7I77E
        Top9030HostMot2.vhd 5I20, 4i65
        TopGCSPIHostMot2.vhd 7I90 SPI
        TopSerial16HostMot2.vhd 7I90 serial
        TopUSBHostMot2.vhd 7I43, 7I61 USB
        TopGCSPIHostMot2.vhd 7I90,7I91 SPI

Click on open project and navigate to where your mesa source is located. In this example it is: /home/tom/linuxcnc/mesa/7i43/CONFIGS/HOSTMOT2/EPPHM2/SOURCE/
Open the hm2epp.xise project file.
You will want to make a copy of one of the .vhd pin files to edit that will best match what you want. It is not a good idea to edit the original ones.
A Bit on Bitfiles
This is not a tutorial for editing bitfiles however here are a few things I have figured out about them:
-
The first array in the .vhd file is the moduleIDType array with 32 entries and the module ID fields are:
'TAG, VERSION, CLOCK, INSTANCES, BASE ADDRESS, NUMBER OF REGISTERS, STRIDES, MPBITMASK'
-
If you add or remove a function from the array you need to add or remove a NullTag entry so the array length is 32.
-
A couple entries of interest are the TAG entry which is the function name and the INSTANCES entry which designates how many entries it appears in the PinDescType array below it.
-
The PinDescType array will vary in length depending on the card but will describe the functions of the IO pins. These should match up with any daughter card IO that is connected so the functions perform as expected.
Time to build the file
Once you have edited your pin file you need to add the vhd file to the library.
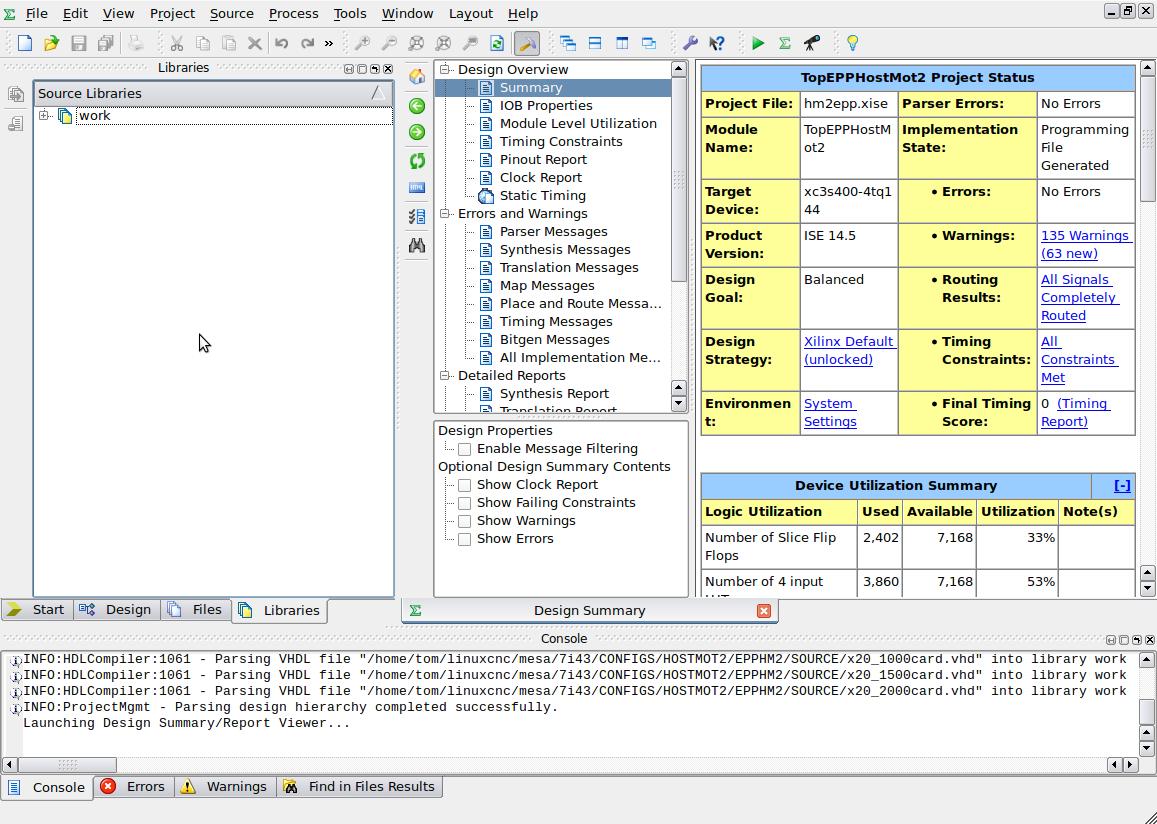
About 2/3 the way down on the screen you should have a library tab in the left middle of the navigator pane. There should be four tabs: Start, Design, Libraries, and Files. Select Libraries and click on work.
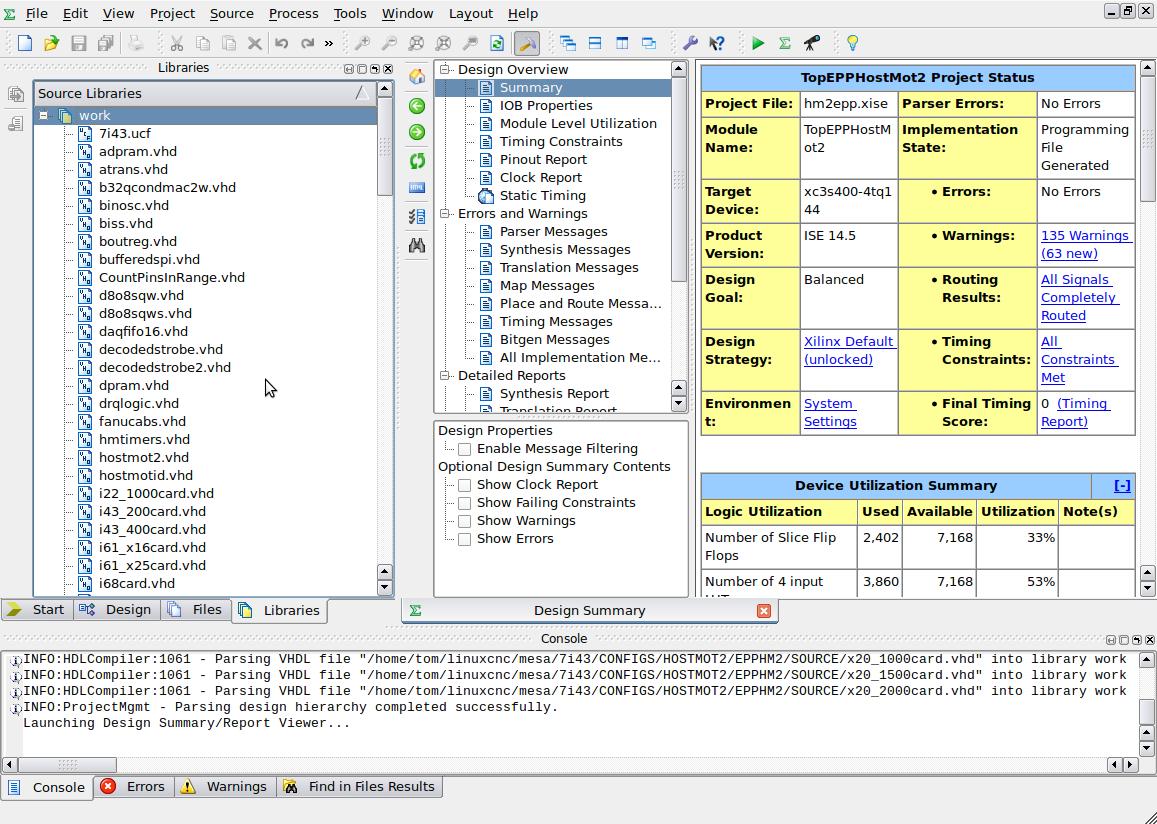
A list of all the source files will be seen then. Right click on work and Add Source then navigate to your new pin.vhd file and add it to the library.
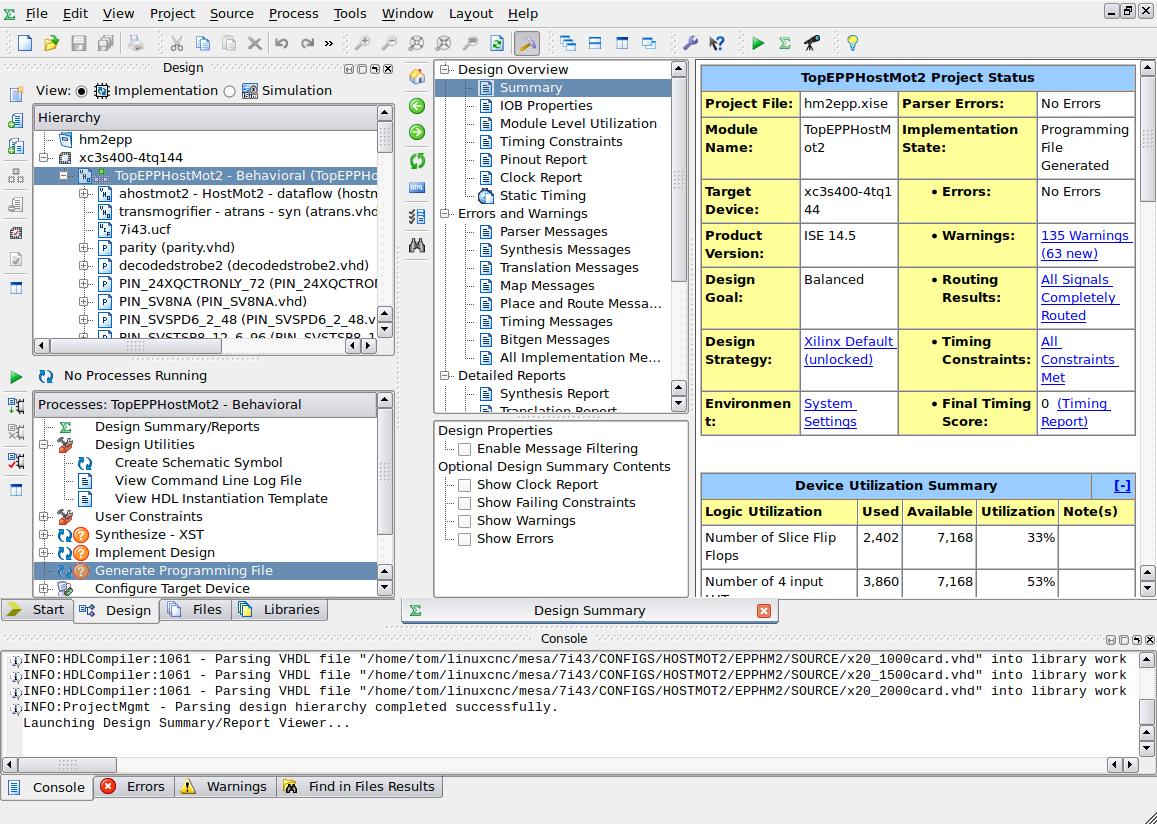
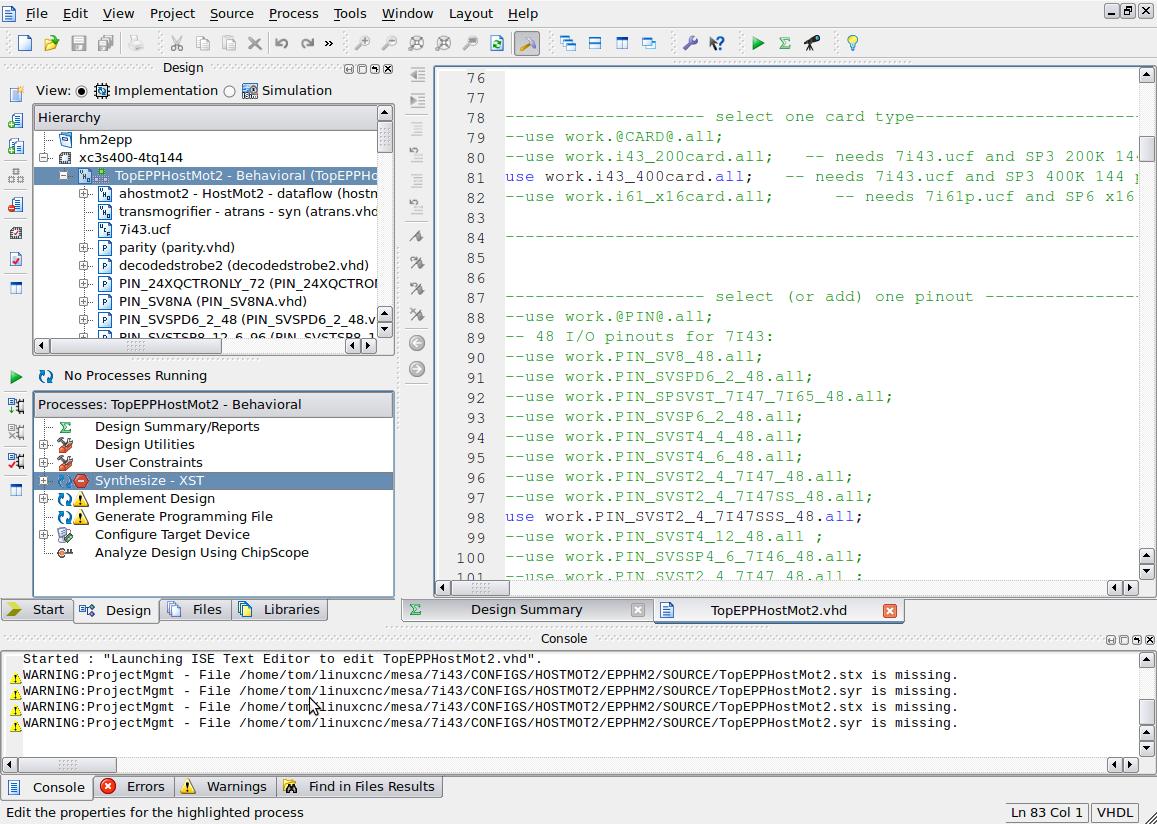
Now chose the design pane. The top level file should have a little green pawn shop symbol by it. Double click on that file:
TopEPPHostMot2 - Behavioral (TopEPPHostMot2.vhd)
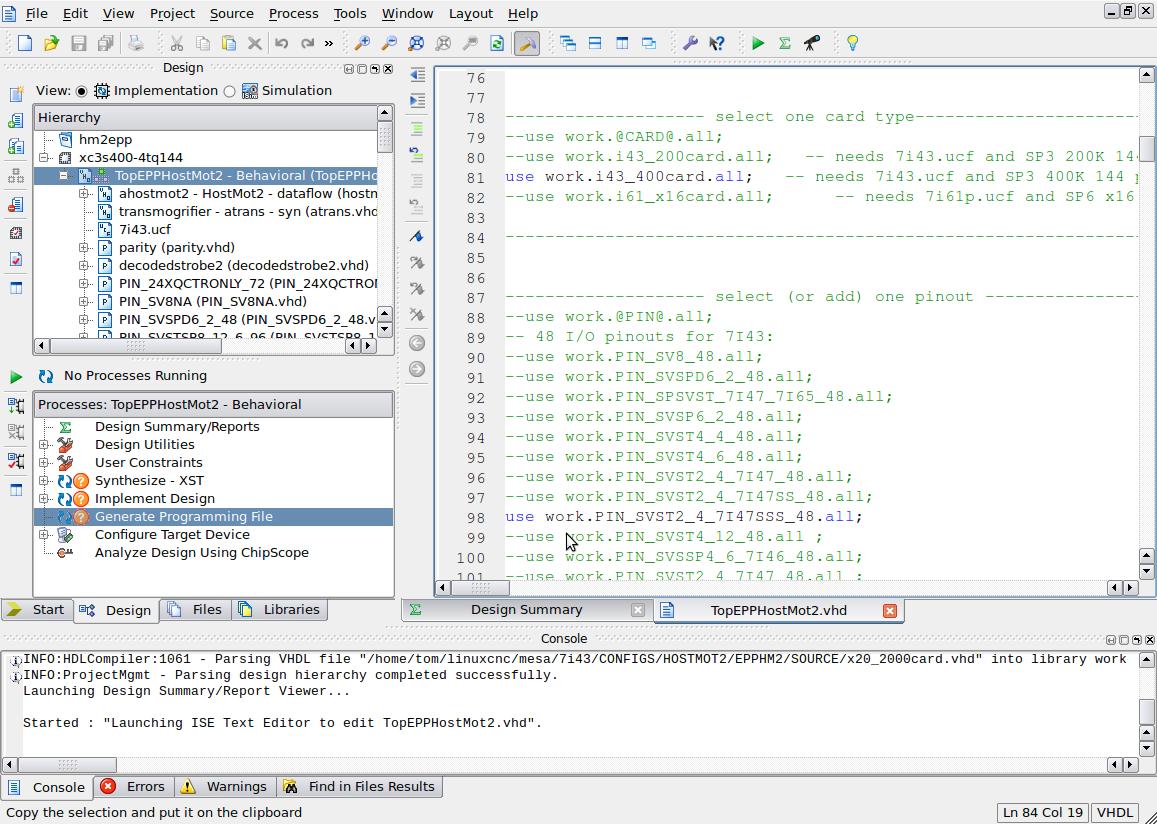
Scroll down in the file and clone one of the pinout lines (and comment out the currently selected one) as shown below.
For example:
--use work.PIN_SVST2_4_7I47_48.all;
Scroll up a bit in the file and make sure the proper board is selected.
For example:
use work.i43_400card.all;
Ok save the file (control s).
Due to a bug in xilinx you may need to change the synthesize setting to optimize for speed so right click on Synthesize - XST as shown:
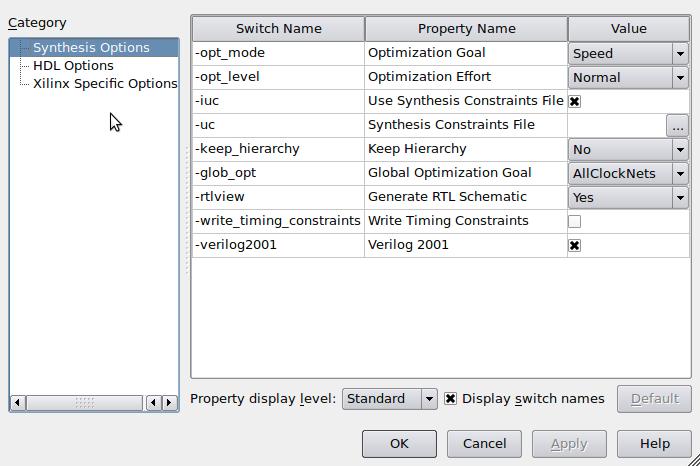
Under Synthesis Options set -opt_mode to Speed instead of area an click on OK.
Now you should be good to go so double click on Generate Programming File in the pane to get a .bit file.
Copy and rename the file
The bit file will be located in the source directory and named TopEPPHostMot2.bit in this case.
When it is done, navigate to the directory linuxcnc looks for your bitfiles and copy the new file over renaming it as you do:
cd /lib/firmware/hm2/7i43-4/

cp /home/tom/linuxcnc/mesa/7i43/CONFIGS/HOSTMOT2/EPPHM2/SOURCE/TopEPPHostMot2.bit /lib/firmware/hm2/7i43-4/SVST2_4_7I47SS.BIT
For Flash based FPGA cards mesaflash is the tool you need to upload your new bit files.
For help open a terminal, navigate to the mesaflash install directory and type:
sudo ./mesaflash --help
That’s it!
I hope this was in some way helpful.